3D workflows start with a Revit model. The Takeoff Agent extracts geometry, maps elements to assemblies, and cross-references your PDF drawings to fill in the full material picture — every quantity traceable back to its source.

How it works
You upload the documents. The Tangible team runs the takeoff using the agent, reviews the results for quality, and delivers structured data back to your workspace.
- Upload or connect documents — Add your Revit models (structural, architectural, site) and PDF drawings. Projects connected through Autodesk Construction Cloud sync automatically.
- Tangible runs the takeoff — The agent extracts quantities from the model, scans PDFs for design intent, and maps everything to standardized assemblies. The Tangible team oversees the process and verifies the output.
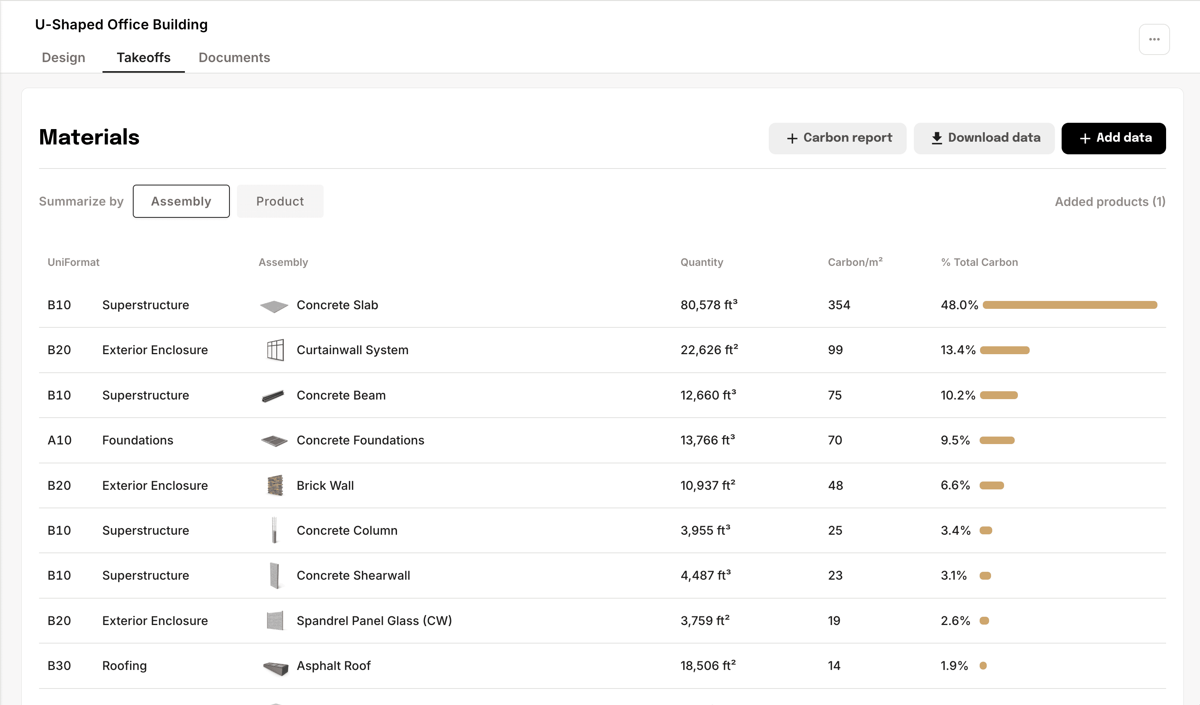
- Review your data — Structured quantities appear in your workspace, typically within 48–72 hours. You can review every decision the agent made, inspect sources, and flag anything that needs adjustment.
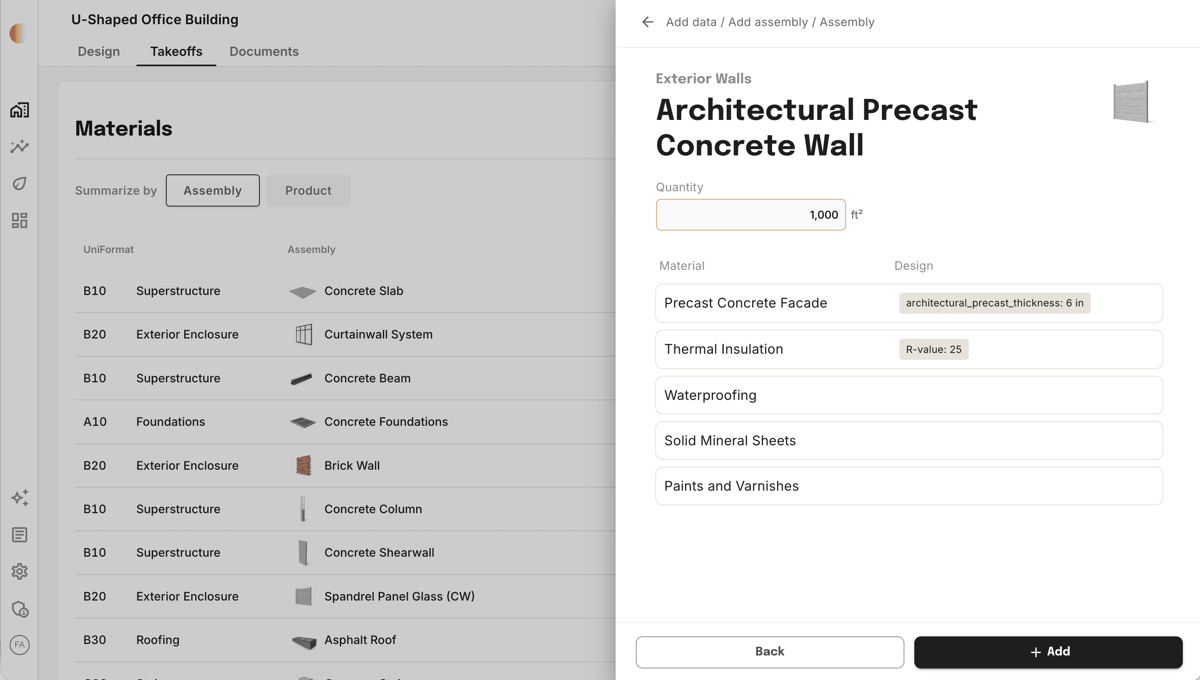
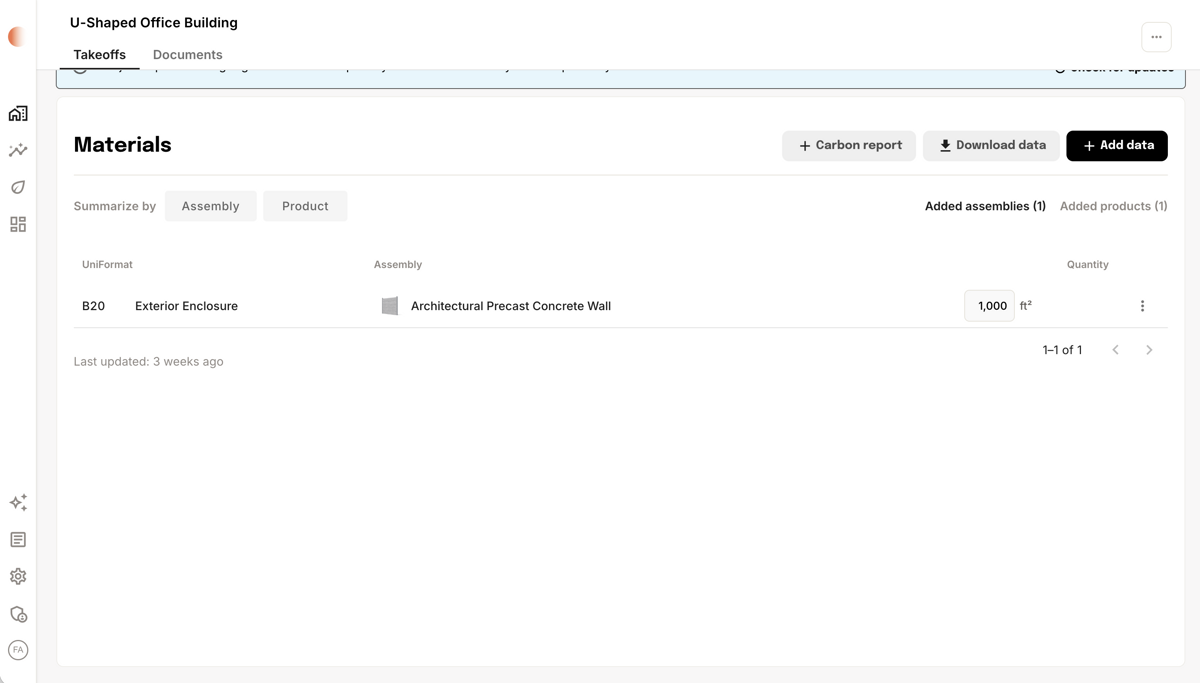
- Customize — Swap material assumptions, adjust design parameters, or refine assembly choices. Changes propagate across the project instantly. Need a deeper review? The Tangible team can help refine results with you.
Tip: Upload both the Revit model and PDF drawings for the best results. The agent uses PDFs to resolve details the model doesn't capture — concrete mix strengths, wall assembly layers, fire ratings.
What the agent does
Behind the scenes, the agent handles the detail work that makes a takeoff accurate and traceable.
- Geometry extraction — Pulls linear footage, surface area, and volume from model objects using standardized formulas.
- Gap filling — Applies assembly defaults from Tangible's Assembly Database to fill in unmodeled layers (insulation, vapor barriers, sheathing, paint).
- PDF reconciliation — Navigates multi-page drawing sets to locate wall tags (e.g., "type INT-2B"), floor schedules, structural notes, and detail callouts. Cross-references these with the 3D model to customize each assembly.
- Metadata extraction — Uses Revit parameters (family names, type comments, level assignments) to automatically categorize building elements.
- Source citations — Every data point links back to its origin. Click any quantity to see the specific PDF callout, Revit element, or Tangible assumption behind it.
3D takeoffs use the same smart defaults and customization model as every Tangible takeoff — project-level refinements and organization-level standards coordinated with the team. See How takeoffs work.
Building disciplines
You choose which scopes to include in a takeoff — run one, some, or all.
| Discipline | What the agent looks for | Example outputs |
|---|---|---|
| Structures | Slabs, columns, shear walls, foundations, rebar | Concrete volumes, steel tonnage |
| Enclosures | Exterior walls, roofing, cladding, glazing | Brick area, curtain wall quantities, insulation |
| Interiors | Partitions, finishes, flooring, doors | Gypsum board area, paint, carpet |
| Sitework | Paving, grading, landscape elements | Aggregate volumes, paver area |
| MEP (Coming soon) | Ductwork, piping, equipment, fixtures, cable tray | Linear duct and pipe runs, fixture counts, major equipment |
The agent works through each discipline one at a time, reviewing every Revit family individually — checking model properties, cross-referencing PDF drawings, and assigning the best matching assembly.
Examples
Example:
- Brick wall — The agent extracts quantities from Revit and assigns a brick wall assembly with default design assumptions for each layer. It then customizes the assembly from your design drawings: for example, omitting a weather barrier when the wall section doesn’t include one, setting insulation thickness from the detail, and matching brick type to what the spec calls out.
- Concrete slab — The agent extracts slab quantity from Revit and applies the slab assembly with a default rebar %. It customizes from drawings and specs when the design differs—for example updating rebar percentage and concrete mix to match structural notes or the project specification.