2D and Non-Model Workflows

Not every project has a 3D model — especially in early design stages. Tangible supports 2D-only takeoffs from PDF drawing sets, giving you structured material data even when all you have is drawings.

2D takeoff workflow

How it works

2D takeoffs are managed by the Tangible team. You upload your documents and the team manually extracts quantities from the drawings, maps them to assemblies, and delivers the data to your workspace.

  1. Upload your documents — Add PDF drawing sets, specifications, and any supporting documents to your project.
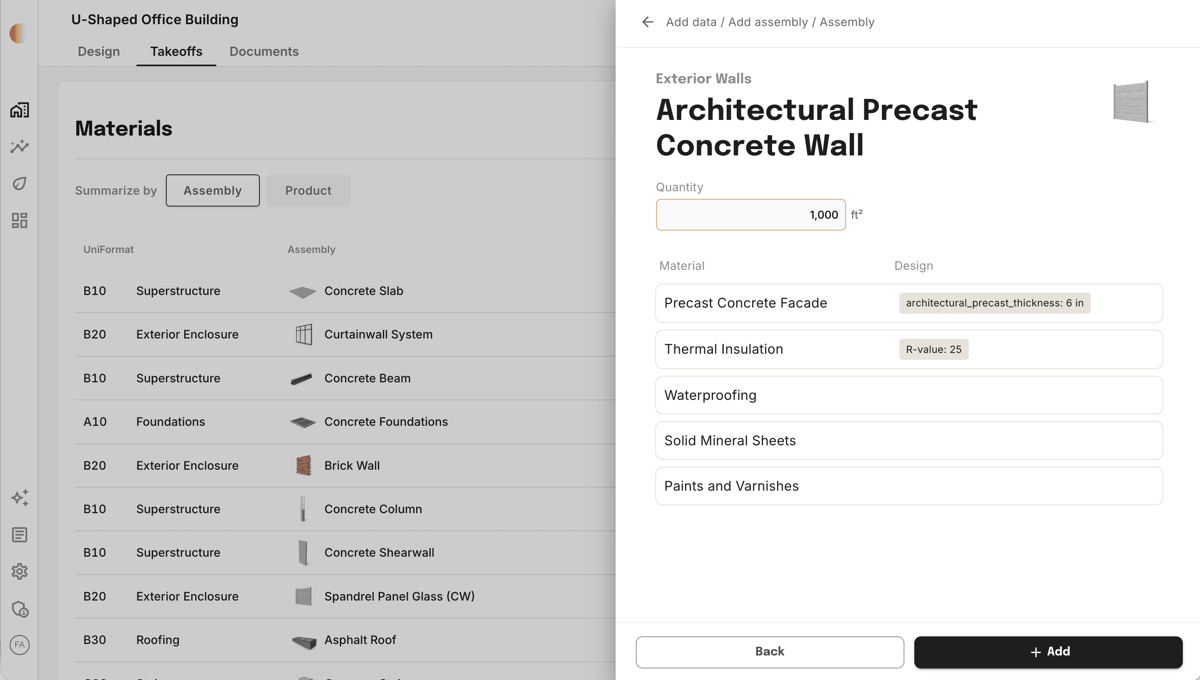
  2. The Tangible team runs the takeoff — Our team reads through the drawings, identifies materials and quantities, and maps everything to standardized assemblies. This is a manual process — more hands-on than 3D workflows.
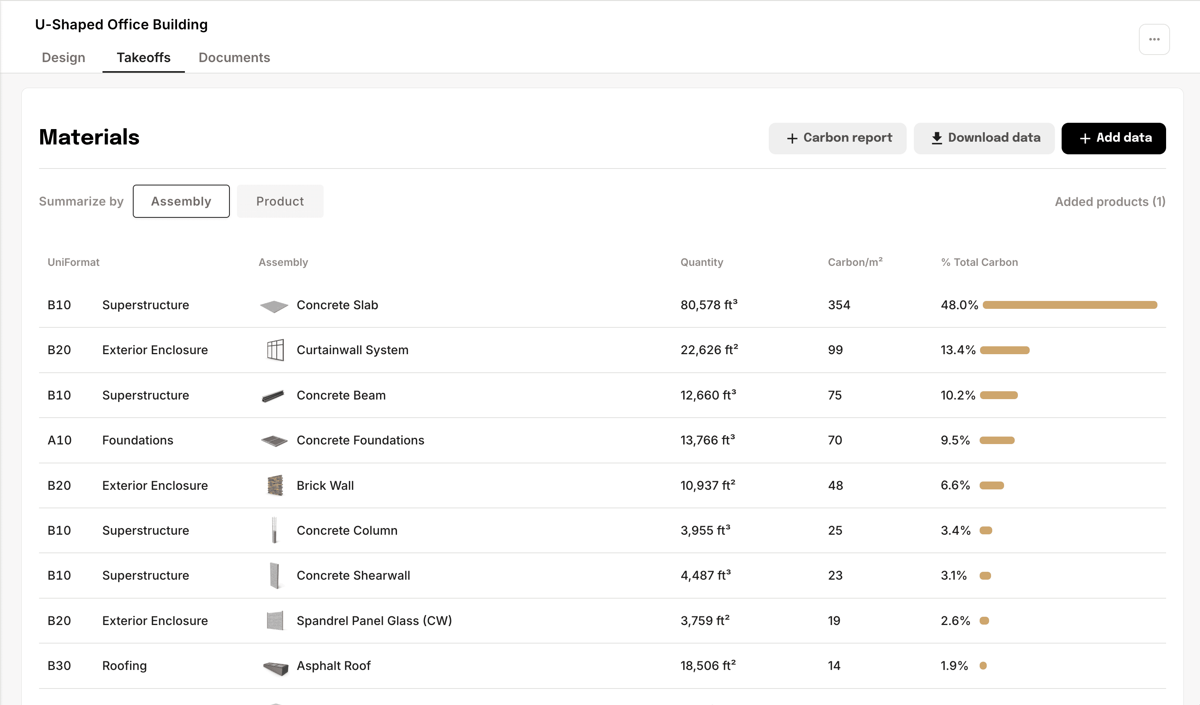
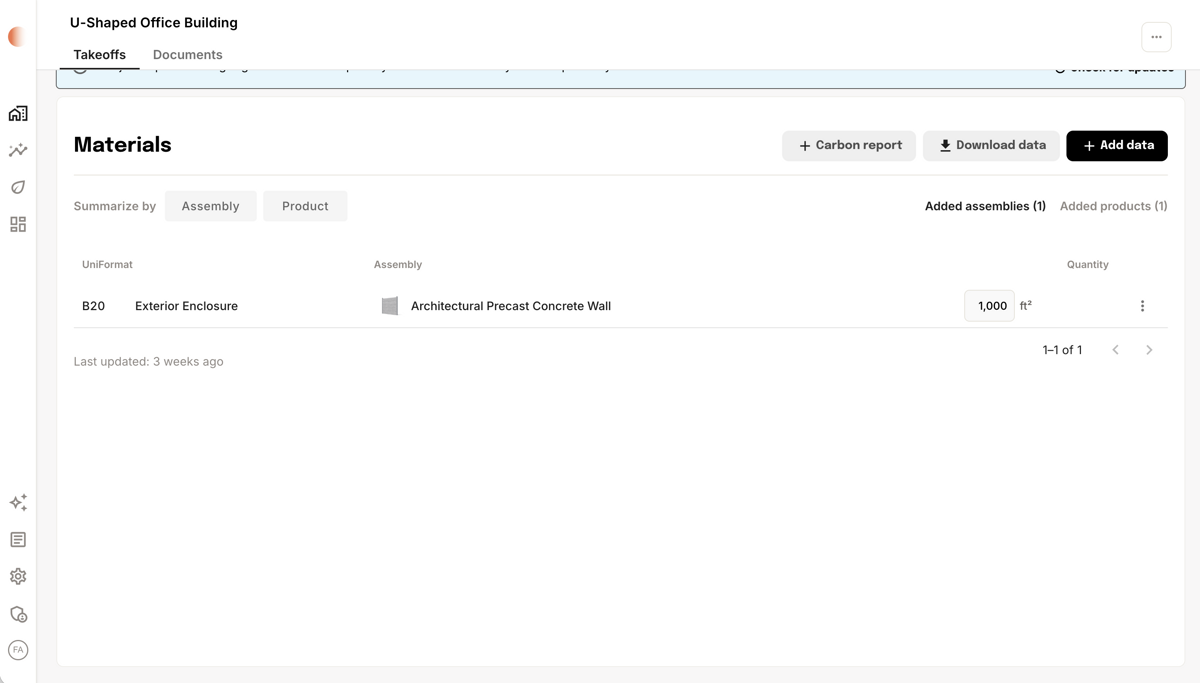
  3. Quantities are added to your project — The team enters structured quantities into your workspace, organized by the same assembly and classification system used in 3D takeoffs.
  4. Review and use — Data appears in your workspace ready for estimating, carbon reporting, or design comparison. Every entry cites the source drawing and page.

2D takeoffs use the same assembly model, smart defaults, and customization paths as 3D — project-level edits when you refine data, and organization standards coordinated with the Tangible team. See How takeoffs work.

Tip: 2D takeoffs typically take longer than 3D workflows since they require manual measurement rather than automated extraction. Plan for 1–2 weeks depending on project size and drawing complexity.

Adding products and assemblies

Allowances, sitework, specialty items, or anything missing from the 3D model — add it directly to your project.

1

Click Add data

  1. Open your project and go to the Takeoffs tab.
  2. Click + Add data in the top right corner of the Materials page.
Materials page with the Add data button highlighted in the top right
2

Select an assembly or product to add

  1. Choose Add assembly or Add product depending on what you need.
  2. Search or browse the list to find the right match.
  3. Click on the assembly or product to select it.
Add data panel showing Add assembly and Add product options with a searchable list of assemblies
3

Enter the quantity and hit Add

  1. Enter the Quantity for the assembly — area, volume, or count depending on the type.
  2. Review the material layers and design parameters. Each layer starts with smart defaults. (Coming soon: ability to adjust smart defaults)
  3. Click + Add to add it to your project.
Assembly detail panel showing quantity input, material layers, and the Add button
4

Review in the Added tab

  1. The added assembly or product appears under the Added assemblies or Added products tab, separate from your takeoff data.
  2. Edit or delete it at any time by clicking the action menu on the right side of the row.
Added assemblies tab showing the newly added Architectural Precast Concrete Wall with quantity and action menu

When to use 2D

  • No Revit model yet — Start estimating during early design stages (SD, DD) before a model exists.
  • Supplement 3D takeoffs — Capture scope that isn't modeled — sitework, specialty items, MEP rough-ins, or elements only documented in drawings.

Coming soon: AI-assisted 2D extraction — the agent will read PDF drawings directly to accelerate 2D takeoffs.

Was this page helpful?